Connect your third-party domain to Shopify automatically
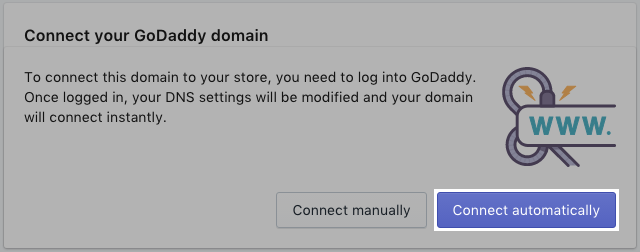
If you purchased your domain from Cloudflare, GoDaddy, or IONOS, then you can connect your domain to Shopify automatically.
To complete the connection, you need to have your login information for your third-party domain provider account.
Steps:
-
From your Shopify admin, go to Settings > Domains.
-
Click Connect existing domain.

-
In the dialog, enter your domain name, such as example.com, and then click Next. Don’t include a subdomain.

-
Click Connect automatically.

-
Log in to your Cloudflare, GoDaddy, or IONOS account.

-
Click Connect, and then click Close.

It might take up to 48 hours for your domain to be fully live. You can click a domain to review its connection details.

If you have trouble setting up your domain automatically, then try to connect it manually from within your third-party domain provider account.
Here the DNS Record that you can update into your domain panel manually.
NameServer requirements for third-party domains
If you’re connecting a third-party domain to Shopify, then make sure your domain’s NameServer settings are managed by your domain provider and not set to custom or external NameServers that point elsewhere.
If your domain is using custom NameServers (for example, for a different web host or DNS provider), then you need to update them to use your domain provider’s default NameServers before you can successfully connect your domain to Shopify.
Missing or incorrect NameServer information can prevent your domain from connecting to Shopify, even if your DNS records are correct.
Step 1: Change your DNS records in your third-party domain provider account
- On your domain provider’s website, log in to your account.
- Find the DNS settings or domain management area.
- Change the following records:
- Point the A record to the Shopify IPv4 address
23.227.38.65. - If necessary, then change the Host name to the
@symbol. - Delete any other A records on the domain if there are any present.
- Point the AAAA record to the Shopify IPv6 address
2620:0127:f00f:5::. - If necessary, then change the Host name to the
@symbol. - Delete any other AAAA records on the domain if there are any present.
- Point the CNAME record with the name www to
shops.myshopify.com.. Be sure to include the period at the end of the domain. - Save your changes.
You don’t need to change the TTL number in your DNS settings. Use the default value.